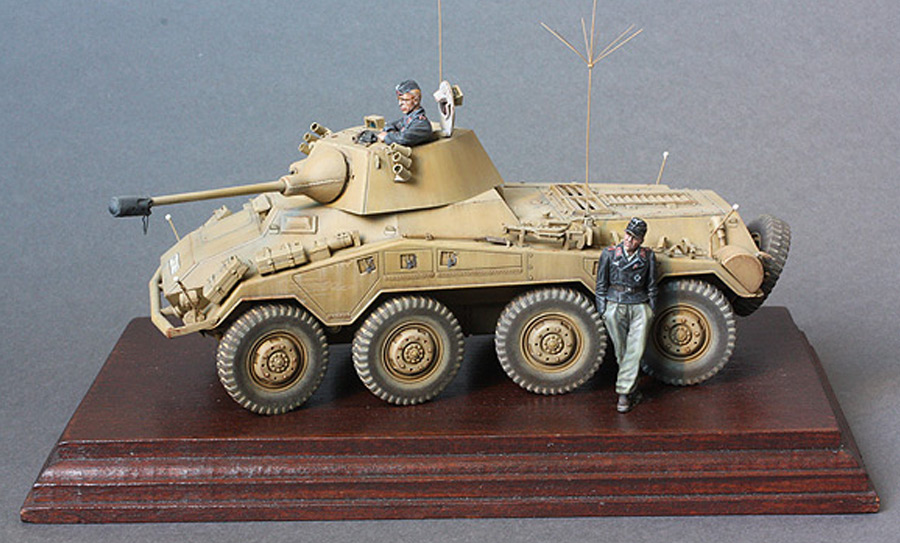
Admiring the models of my friend Mario Eens and curious to know how he had managed to fix his magnificent T 34/76 Chtz model in a stable and solid way to his competition base, I could not resist the question and during the interview came out explained me the technique that adopts to fix its models on a simple wooden base without showing the fixing pins: “See Andrea, it’s anything but difficult!”.
For lack of time to devote to our hobby and space in our homes and the contemporary desire to highlight the difficult work of super-finishing and finishing of our static models, the philosophy of exposing vehicles on simple wooden bases was born.
Below I will try to summarize the salient steps of this brilliant but simple and effective procedure.
It is possible to do this by using only 2 pins obtained from a 0.5 mm diameter brass wire placed strategically.
Depending on the type of wheels or rolling train it is possible to insert the pins into the wheels, the arms or directly to the suspension system of the static model. Being able to place the pins directly in the wheels is advisable because in this way you will be able to hide them better but in some cases it can be more complicated and more difficult as in the case of half-tracks or tracked with particular rolling trains (in this case it may be necessary to drill also the tracks). Being able to place the pins between the suspension arms is more practical and safe.
In the example I preferred to prepare the model (a Pz. Kpw. III J from Dragon) at the beginning of the assembly phases, in order to do not handle the model at the end of work with the risk of damaging it.
1) Choose two suspension arms, one on both sides of the model
The first step consists in choosing two suspension arms, one on both sides of the model.
You can take the second from the front on the right side, and the second from the back on the left side (or vice versa!). Placing the diagonal fixing pins will help to balance the model on the base. It is not the case to choose the first arm from the front and back because there is a greater risk that the fixing pin can be easily seen observing the model front or rear once fixed to our base.

2) Perform the holes
With a drill bit (also manual) I makes a 0.5 mm hole in the suspension arm making sure that the pin is hidden by the wheel when the model is viewed sideways. It is really important that the hole is in correspondence with the center of the wheel so that the wheel itself covers our pin when viewed from the side. Otherwise, the pin will be visible from the side and this will not be very realistic.
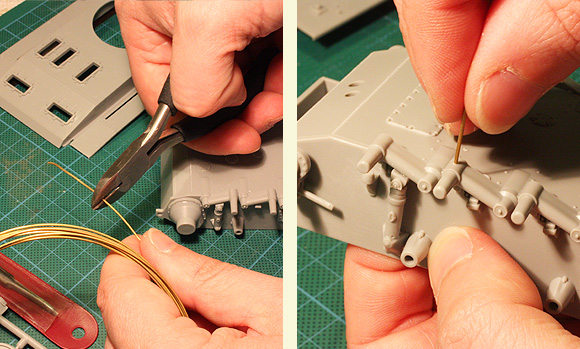
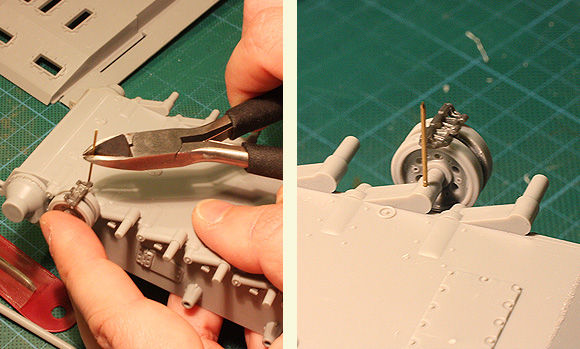
3) Insert the pins in the suspension arms
Then insert the pins into the suspension arms and, with the wheels inserted, carry out a preliminary test of the model on the base (holding it up because with the pins we will not be able to place it on the base) to determine the position in which it is necessary to make the holes on the base.
A tip: we can dip the tip of the pins in a little white paint to leave a mark on the base so that it is much easier to see where to make the holes.
4) Drill holes in base
Sometimes you may need to make small adjustments and make new holes next to those already done even if you decide to change the position a little when you try the model on the base.
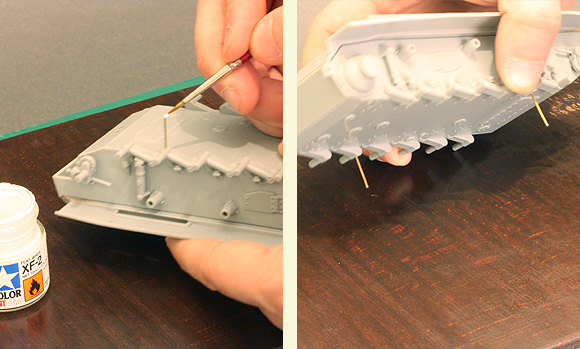
5) Fix the pins and retouch them
Once the dry tests have been carried out and the right position has been found, the part of the pins out from the model will be painted in black to make them invisible. A drop of cyanoacrylate at the inserts of the pins on the model and base will serve to fix everything in a stable and resistant way.
As you can see, it’s anyting but difficult!