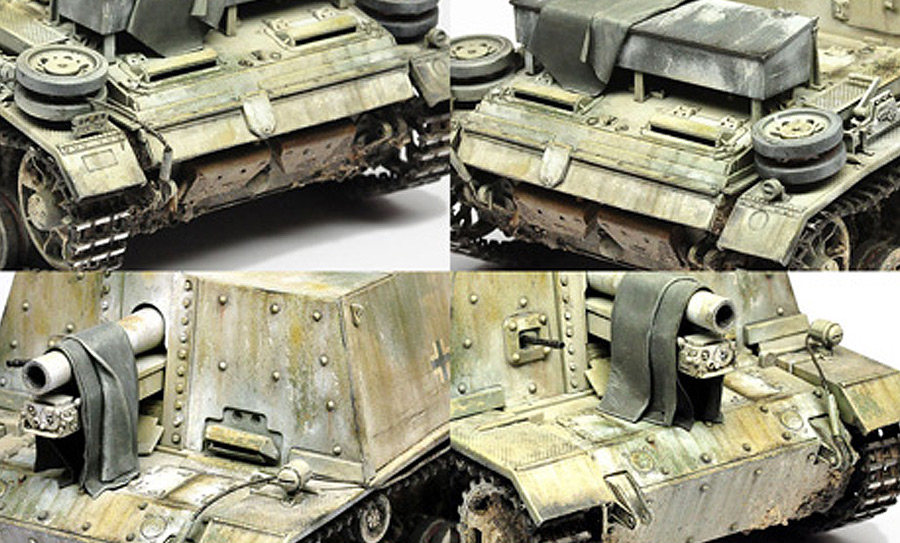
1/35 Sturm 33B by Dragon
I bought this model on eBay, already built and upgraded with metal barrel, metal MG, metal tracks, and some small PE and resin parts. Unfortunately, the building quality was very moderate, and there were many errors to fix. Some of them were very hard to repair, so I decided to hide them with tarps made from two part epoxy putty from Milliput. In this photo the model is ready for paint and the tracks are blackened with a style of Colour Modulation Blackening that I will discuss in a future article.

The model was primed with Humbrol Hobby Spray acrylic primer.

I always spray my models with a very dark, in this case black colour, for preshading. I don’t just spray the edges of panels and details like you see airplane modellers do. This will create dark lines that will be visible after painting and will affect the final look of your model in a negative way.

Please note the road wheels that were airbrushed with red primer colour on the inside and were then covered with masking stripes.
White washed models are my all time favourites, and I figured that the best way to produce an interesting white washed tank, is to do it with incorporating the hairspray technique. As far as I know, this technique was firstly introduced by Phil Stutcinskas, and was further developed by Michael Rinaldi.
So the next step was to spray the model with ordinary hairspray. I got my own to avoid conflicts with the wife! After half an hour I painted the model in a dark yellow base colour, using Tamiya paints and the Colour Modulation technique, with lighter tones on the upper and horizontal areas of the model. The crosses were also painted on using LionRoar stencils. The box was painted grey for more visual contrast.

By using a hard bristle brush and tap water, I made chips on the yellow colour, revealing the dark base underneath. This is a very convincing way of making irregular chips on the edges of panels, around the hatches and other extruded details. The scratches were done with toothpicks and other sharp objects.

Repeating the process of the HS technique, I sprayed the green camouflage, also with some CM, and as soon as I cleaned the airbrush I started chipping once more.


It was now time to give more depth to the colours so I used a couple of MIG Productions filters and then some streaking effects from AK-interactive.

Once again I sprayed some HS and then some white from Tamiya. Since I decided to make a Worn Winter White Wash (the 4 Ws) I sprayed very light coats of the white, almost transparent in most areas. Then, following the previous steps, I started chipping the white paint, but this time more heavily, especially in vertical areas where water would run down the panel sides, and around the corners and hatches where the previous chips of the base colour were done.


To make it look more interesting I added negative chips of white colour (mapping), in various areas, trying to be as random as possible.

I gave the model another filter to give it more chromatic richness. I used a light gray filter, but a blue one can also be used to give a colder look. I also added a pin wash with a dark brown colour to enhance the details.

In order to further enrich the colour variations around the model, I used the newest OPR technique (Oil Paint Rendering), also developed by my all time favourite modeller Michael Rinaldi. This technique is described here by the master himself.

I used white and grey MIG Productions oils for the white, various yellow and light brown colours for the yellow, a couple of greens and greys for the green, and finally dark brown oils for the chips and scratches. During this step I also hand painted smaller details like the MG and tarps.
After the white wash fun, it was time to go dirty… so I started with some predusting coats of Tamiya earth tone colours, which were lightly sprayed on the horizontal panels and the lower areas of the model. Not very visible on the photo, but essential to help the following layers of pigments adhere better on the surfaces of the model and also make a subtle colour variation on the dust.

The next steps were the application of MIG pigments for dust and mud and many of the amazing AK-interactive products to create wet effects, oil streaks, dust effects and many others. The methods of application of these products are available on the AK-interactive website.

Finally, I gave a couple of washes on the tracks and added some pigments, used black colour pigment on the inside where the rubber wheels touch the tracks and sanded the outer side that touches the ground to give it a nice shiny metal appearance. Some more touch-ups here and there and the model was finished:


I hope you enjoy this article!
Happy modelling,
To look at the finished model go to the gallery.