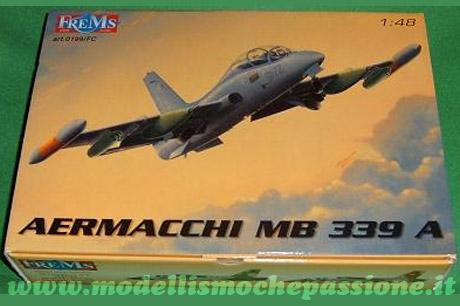
Modello/Kit: FREMS
Accessori/accesories:Fotoincisioni/Photo etched parts Eduard set. N° 48320
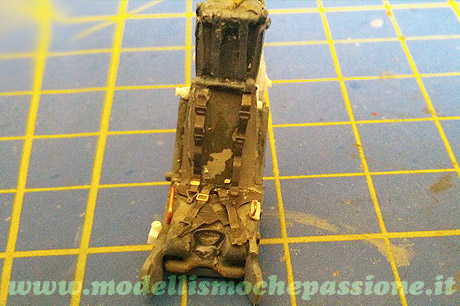
Seggiolini/Ejection seats: Martin Baker Mk IT-10 F Pavla set N° S 48018
Decals: Sky Model set N° SKY48022 dedicated to MB-339 A/PAN/Reparto Sper.
Assembly
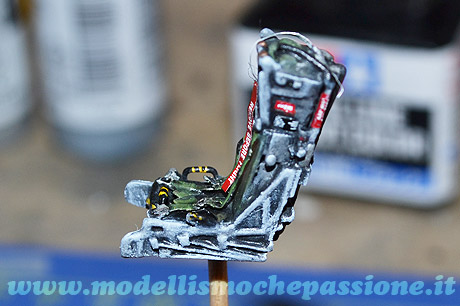
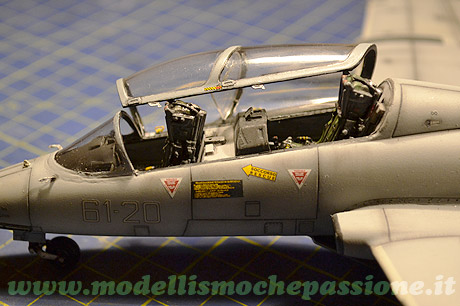
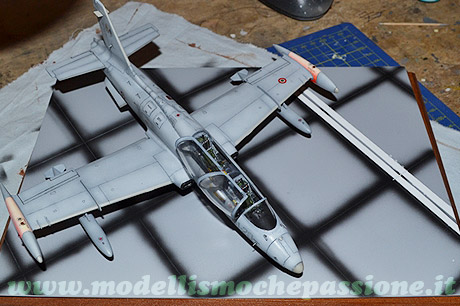
I began assembly of the cockpit by replacing the original ejector seats with resin ones made by Pavla, making some small changes to improve the seat and shoulder belts since these were moulded into the resin and other details and did not convince me. I removed them delicately with a blade and replaced them with photo-etch and scratch built parts.
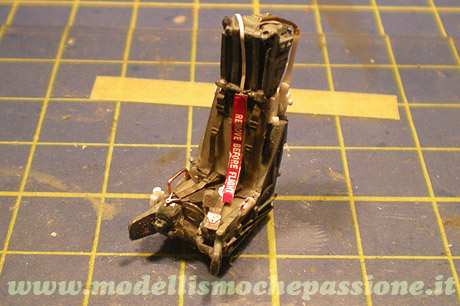
Painting began with a coat of primer followed by Vallejo Model Color 160 Neutral Grey 160 to create shadowing. I painted the seat and back [parachute area] in Olive Drab, following with a dry brush of Model Master 4755 Dark Gull Grey for the highlights. After all this, I applied a coat of Gunze acrylic gloss varnish. This coat is very important and should always be applied as it acts as a protection layer for the base colour against reaction and or staining when washes which spread by capillarity and further dry-brushing are applied.
The seat and shoulder belts were first painted Olive Green and then highlighted with a dry brush of Chrome Oxide Green oil colour. Humbrol 62 Leather, was used to paint the headrests with Humbrol Copper for the highlights.
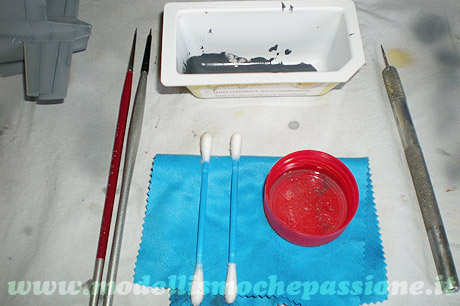
Now it’s time for the washes for which I chose the convenience of the Tamiya products Accent panel Color, which are turpentine based and can thinned with normal Humbrol thinner. This enhances every detail and the base of every raised detail to give a 3D effect. I waited for the wash to dry, then I dry-brushed with steel grey oil pastel. I then highlighted raised parts like bolts, belts, etc,etc again with the dry-brush technique using Light grey oil pastel. The brand of oil pastels used, is Neopastel, which in my opinion has the best pigment quality, range of colours and ease of use.
To seal the oil dry-brushing, I applied a coat of gloss, followed with the application of decals taken from the decal sheet and from ‘’spares store’’. A coat of Tamiya Satin sealed off all colour layers.

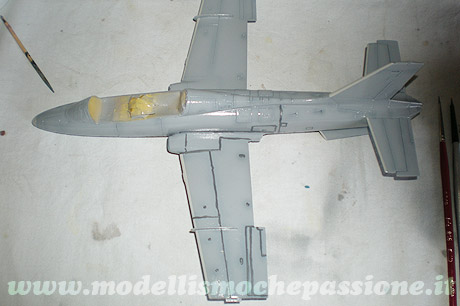
 After the seats, I progressed to the cockpit by removing the original stamped details of the consoles and instrument by sanding with wet sand paper and replacing them with PE parts from Eduard. I also was careful to lower the rear cockpit floor by 8mm. After spraying the primer, I did some pre-shading in black followed by a few thin coats of Gunze H308, bring out the shadows below. After assembly of the control column, the throttle levers and the electrical cables, made out of appropriate diameter copper wire, I sealed with a layer of gloss varnish, washed with dark gray oil colour and dry brushed with Light Grey.
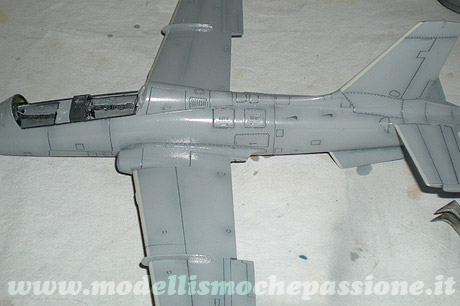
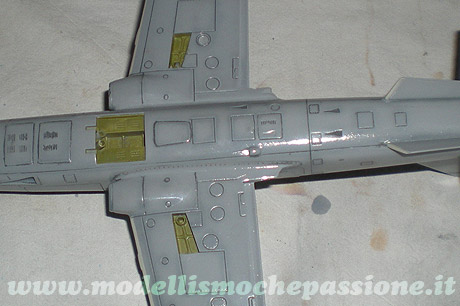
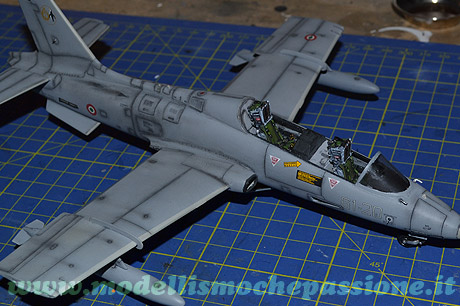
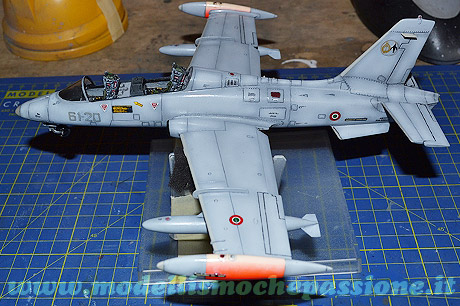
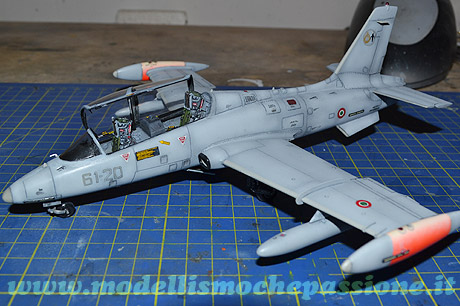
I progressed to gluing the fuselage, wings and stabilisers, replacing some panels with photo-etched parts and removing the original antennae which in the end would be replaced with the finer PE ones, taking care of the version and nationality of the aircraft. Before starting the construction and painting processes, it is always necessary to procure extensive reference material. Fit is quite good but care must be taken in aligning properly the fuselage halves and the correct dihedral of the wings. In this case, some filler has to be used to connect properly all parts. For various reasons, I personally use CA glue [Attak, Loktite, etc] to fill in cracks. The main two reasons being that smoothing down with rough [800] all the way down to the finest [1200] wet/dry sand paper, gives a very smooth and polished result. The other reason is that is the panel lines are rubbed out and have to be redone, the re-scribing is easier and does not leave annoying fissures caused by the break-down of the edges if filler is used instead.
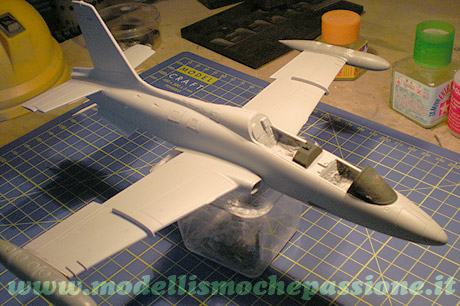
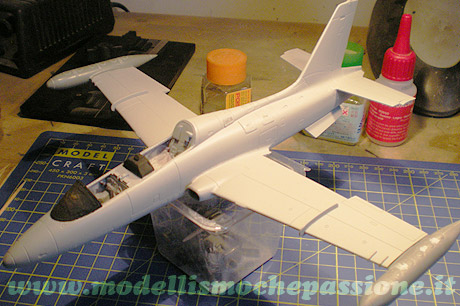
With the construction done, I sprayed on a coat of primer and did the pre-shading with Tamiya XF-69 Nato. I used this because it is a desaturated black and I prefer it to normal black.
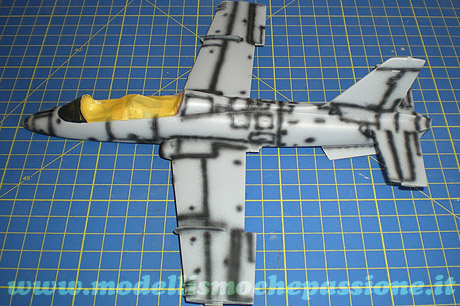
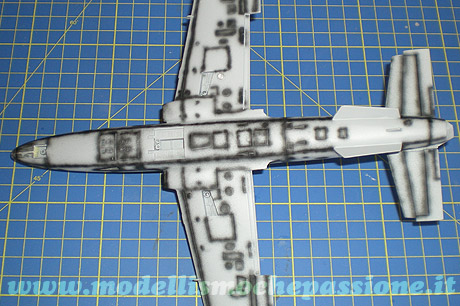
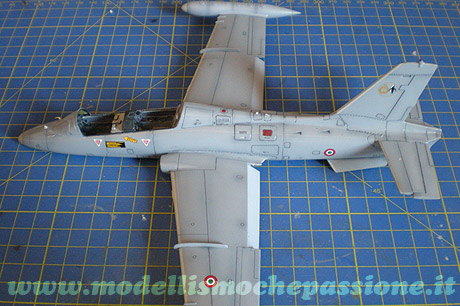
I began the painting by applying 5 thin coats of Gunze H307, lightened with Tamiya XF-2 White and thinned with 70% yellow capped Tamiya Lacquer thinner, ensuring in the process, to leave just visible the shadowing underneath. I then lightened the middle of the panels with mix of the same colour but with more white added and thinned even more than the original.
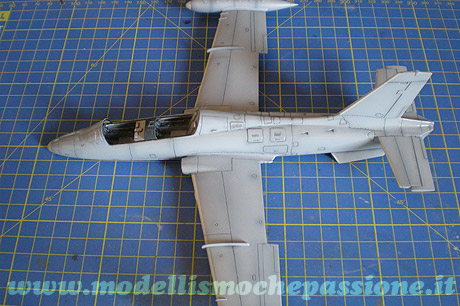
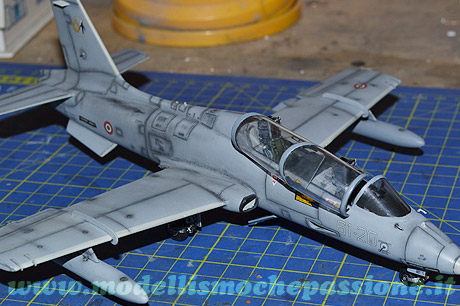
After the painting, I applied a few thin coats of Gunze acrylic Gloss, in order to prepare a good base for the washes. Now the model looks like a caramel apple. To enhance the panelling, I used 20% black and white oil colours thinned 80% with universal thinner making the mix flow by capillarity through the panel lines.
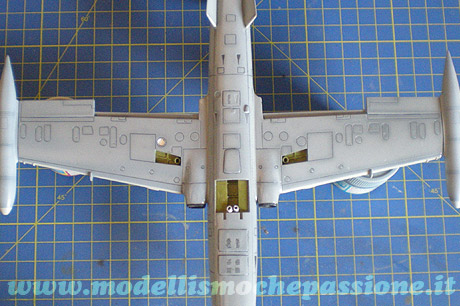
Now its time for the decals, put in place with the use of Microsol and Microset. I then sprayed three thin coats of Gunze matt and finished the weathering with a light veil of black pigments applied to ‘dirty’ those parts subject to maintenance and the various vents of the Viper engine. In order not to make the weathering too heavy, the brush with the pigments should be ABSOLUTELY discharged. In order to obtain a light and delicate effect, the brush is dipped dry into the pigments and then discharged on a paper towel to lighten it for the dry-brushing. At a certain point, the brush will not leave a black trace on the paper but as if by magic, when applied to the grey camo, it will leave a barely visible effect that will blend and merge in complete harmony with the rest of the paint.
The undercarriage, doors, antennae and canopy had been painted and weathered separately and then assembled.
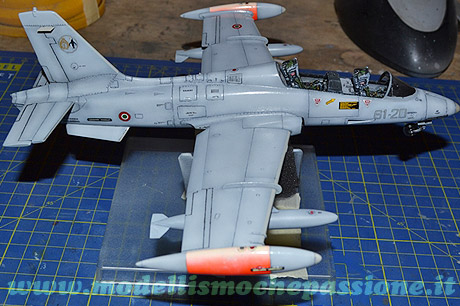
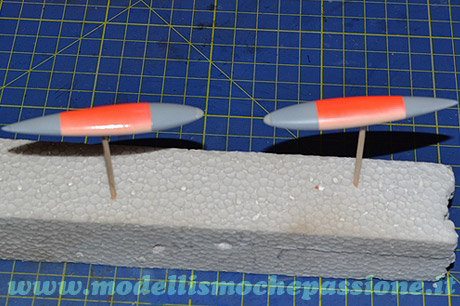
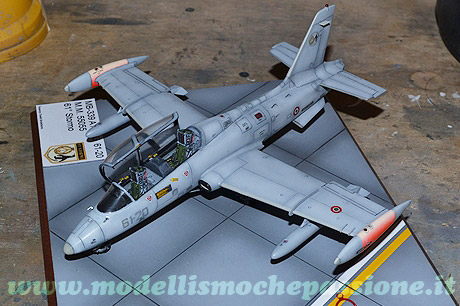
Preparation and painting of the wing tip tanks
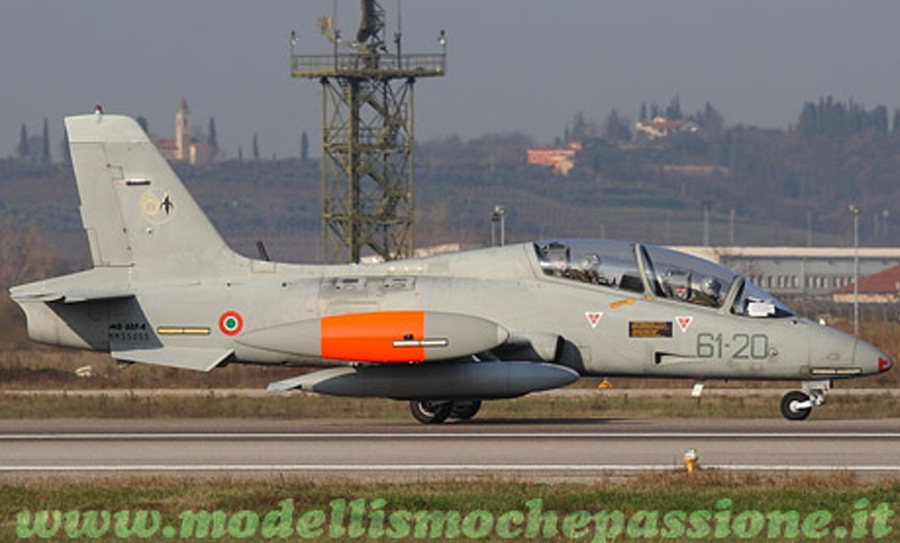
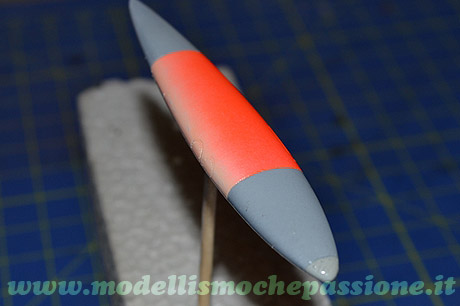
The tanks were assembled, primed and painted in exactly the same colours tones and methods as the aircraft. The Day-Glow strip was masked and base coated with a white primer. I then made a first mix two parts Gunze H413 and one part Gunze H14 to create the Orange fluoresce which I’ll call Mix1. Then I made a ‘cream’ colour for the fading effects caused by sun and weather, by mixing Tamiya XF2 White and XF3 Yellow. I did not take note of the ratios of the mix but went by rule of thumb but anyway, it’s a very light cream colour that I’ll call Mix2. Both colours were thinned with Tamiya’s yellow capped lacquer thinner.
A word aside on the use of this thinner; you might ask why I use a lacquer thinner to thin Gunze and Tamiya paints: following the advice of an expert in this hobby I tried it, with optimal results. The resulting colour has a silky texture and a patina which I prefer [personal opinion] as long as it is thinned properly, that is 65% upwards. Moreover, if a Teflon spray lubricant is used on the choke, needle and cup, the paint will not create tip-dry during prolonged use even at very low pressures of about 0.6 BAR.
Back to the Tip tanks – Now I spray Mix 2 [cream] from the top part to about the middle of the tank. Then with Mix1[orange] the remaining parts, ensuring that a merging effect is created to simulate colour fading by spraying the colour from the bottom upwards. I found a dry brush with Neopastel oil pastels very useful to further harmonise this merging effect.
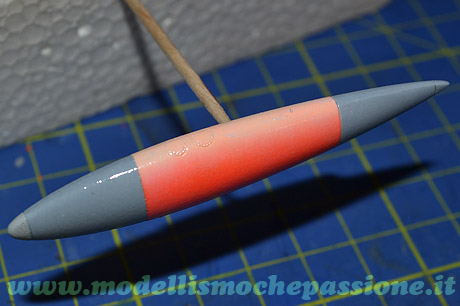
Now it’s time for the reflective panels used for night flying navigation, found on the nose, 3⁄4 up the fuselage and on the wingtips. To address the lack of these panel both on the decals sheet and in after market, I had to build them from scratch, using 0.3mm plasticard, painted with the same cream colour of the tanks with a little yellow added. To make the black edges, I cut some micro strips of black decals and paid a lot of attention to fix and unite them. To surround the panels in black, I used 0.1mm black Radiograph. I then stuck them on with a generous coat of Future. I then glued them to the tanks with a layer of Tamiya green capped ultra thin glue. Another coat of Future and then, with a very thin strip of Tamiya masking tape and Maskol, I masked off the Day-Glow parts that have to remain bright applied a coat of matt varnish as on the aircraft.

Now it’s time for the display base

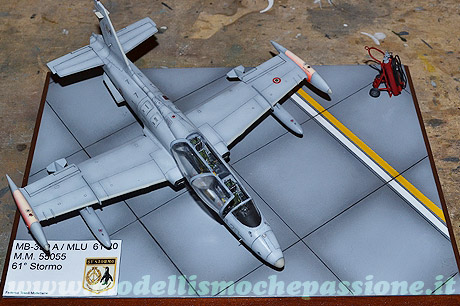
Base
As a base, I wanted to reproduce an airport parking apron, by scribing concrete slabs on 2mm plasicard. I did some pre-shading on the slab joints and drew the white and yellow stipes. I primed the base with Tamiya grey primer, painted the stripes and after masking them, I sprayed the cement grey for which I used Gunze Neutral grey, later lightened up with white applied to the centre of the slabs. I sprayed on transparent polish and enhanced the joints with a wash of Tamiya Black panel line accent colour. Finally I sprayed on a coat of matt varnish.

 Now with the base ready, the aircraft can be added
I hope this tutorial proved useful and remember that whatever the results, the important thing is to enjoy yourself, have fun and never lose heart; in case of failure…. no problem, start again…..and guys….try, try, try until things succeed without worries.
Wish good modelling to all
Frederico Toselli